|
|
 |
 |
 |
|
|
 |
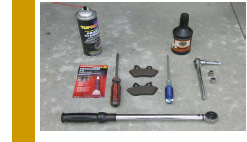
| The
following tools
are required
to service your
calipers: |
- One
1/4 inch
twelve point
socket
-
One ten
millimeter
twelve point
socket
-
One 1 inch
socket wrench
-
One flat
head screwdriver
-
One phillips
screwdriver
-
One spray
can high
quality
brake cleaner
-
One torque
wrench
- One
Pair Lyndall
Z-Plus pads
- One
bottle of
Harley-Davidson
brake fluid
|
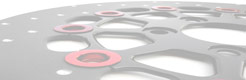
| There
are two bolts
holding each
caliper on Harley-Davidson
motorcycles.
There are also
two pins that
hold the pads
in place. If
your motorcycle
has two front
calipers, please
start by removing
the caliper
furthest away
from the master
cylinder, which
on most Harley-Davidson
motorcycles
is the one on
the left side
of the motorcycle,
or in other
words on the
side of the
clutch lever. |
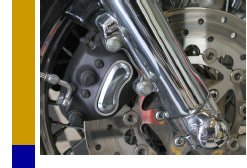
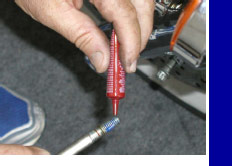
| The
first step is
to loosen the
two pins that
hold the pads
in place with
the one inch
twelve point
socket. Once
this has been
accomplished,
remove the two
bolts that secure
the caliper
to the front
forks with your
ten millimeter
twelve point
socket. |
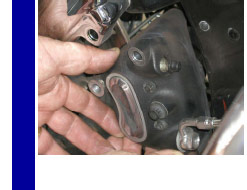
| The
caliper can
then be gently
removed from
the rear of
the motorcycle. |
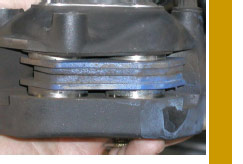
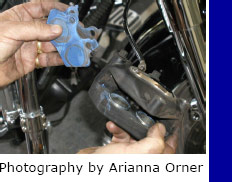
| Once
the caliper
has been removed,
turn the caliper
over so that
you can se the
condition of
the pads. Leave
the pads secured
within the caliper
and have someone
else assisting
you to pull
on the front
brake level.
As they do,
notice how the
pistons in the
calipers are
moving as hydraulic
fluid will move
initially while
the pistons
that are furthest
away from the
source of hydraulic
pressure will
in all probability
hardly move
at all. |
|
|
|
 |
|
 |
 |
 |
|
|
| This
is due to a number of
factors. First, all of
the pistons in a Harley
Davidson caliper are virtually
the same size. The further
the piston is away from
the source of hydraulic
pressure the more pressure
it requires to move at
the same rate as the pistons
that are closer to the
source. The only way that
this can be accomplished
where both pistons front
and rear move at the same
rate is with differential
bore, meaning that the
pistons furthest away
from the source are smaller
in diameter so that less
hydraulic pressure is
required to move as freely
as the pistons that are
nearest to the source
of hydraulic pressure. |
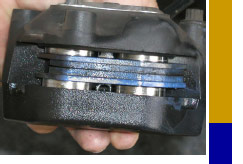
| The
other problem that causes
pistons to drag and hang-up
is that since there are
no dust boots on the pistons,
brake dust and general
road dirt accumulates
around the pistons. Once
the brake cleaner spray
has successfully removed
all of the debris, take
your flat headed screw
driver and place the blade
in between the old pads
and force the pistons
back into the caliper.
Have you assistant pull
on the brake lever once
again and repeat the process
as described above until
all four pistons move
relatively freely. |
| Once
you are satisfied in their
performance, remove the
two pins that secure the
pads in place with the
one inch twelve point
socket. Once the pins
have been removed, gently
remove the pads that were
secured within the caliper.
Take notice of how the
pads were installed since
they are different in
configuration. Install
the two new pads. Once
in place, re-insert the
two pieces and loosely
tighten until the caliper
has been re-installed
on the rotor. |
| Gently
spread the two pads apart
with your fingers until
there is sufficient space
between the two pads to
allow you to re-install
the caliper on the rotor.
Once the caliper has been
successfully re-installed
place a few drops of Blue-Locktite
(242) on each bolt and
tighten each bolt between
28-38 pounds of torque.
Once they have been tightened
install the 1/4 inch twelve
point socket and tighten
the two lock pins that
hold the pads in place. |
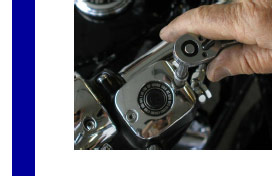
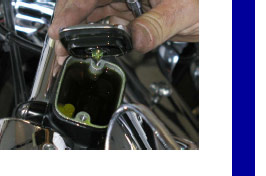
| After
you have successfully
accomplished all of what
has been outlined above,
top off the master cylinder
if necessary by removing
the master cylinder cover
with a Phillips screw
driver and replacing it
when finished. Pump the
brake lever until all
of the air has been removed
from the system. I have
found that after pulling
on the lever a number
of times if you flick
the lever a number of
times you will notice
that there will be little
movement in the lever
before full pressure can
be applied to the pistons. |
| If
you are interested in
maintaining maximum braking
performance as well as
brake longevity it is
recommended that you follow
the above cleaning procedure
every 2,500 miles. If
you prefer having others
service your motorcycle,
please consider giving
them a copy of this document
and have them perform
this process for you. |
|
|
|
| |
|
|
TO
ORDER
YOUR REPLACEMENT
LRB
Z-PLUS PADS,
PLEASE
CALL
(800)
400-9490
OR
VISIT OUR WEBSITE:
www.lyndallracingbrakes.com
|
|
|
|
|

|
|
|
|
 |
 |
|
| |
|
|